
The positive response to my post about “Why I Teach vim” has been extremely appreciated and the most common question I have received is “OK, but how do you teach vim? This is a much more difficult question to answer in a blog post as I have repeatedly found trying to explain teaching methods in writing is difficult. With that said, sometimes perfect is the enemy of good enough and let me see if I can take a shot at it.
I will even complicate things further and try to simultaneously teach teachers to teach vim as well as perhaps help a few programmers who want to take vim for a spin (maybe even who have been previously frustrated by it).
I must begin with a bit of historical context. vi (the father of vim) was invented in 1976 by Bill Joy at the University of California, Berkeley. The potential user of vim needs to be aware that in 1976 many people used not monitors but printers to interact with a computer. As such, the most common way to edit text was with a line editor which, as you might guess by the name, edited text one line at a time. vi was different than a line editor, vi was a visual editor and, ultimately, the name vi came from VIsual.
By 1976, people (really companies) were starting to be able to afford more CRT terminals, think your parent’s (or grandparent’s) old style TVs. There were no mice, except in prototype computers at Xerox PARC, and the programmer had only the keyboard to interact with their text editor. CRT terminals were a huge advantage for programmers used to line editors and literally reams of printer paper to do their work and it was time for a visual editor to take advantage of these wonderful CRT terminals allowing people to edit an entire screen of text at the same time!
Let me digress for a second on the assumption most 2020 humans make about using a text editor. Modern text editors (and word processors) are all, of course, visual, but are also called modeless. The computer figures out what you want to do by the way you interact. Start typing? The computer assumes you want to insert text. Click somewhere in the text? The computer assumes you want to move the location of insertion. Menus give you all sorts of commands and the computer knows by the nature of your mouse (or trackpad, if you prefer) actions and movements what you want to do and when you want to do it.
But Bill Joy’s computer did not have a mouse. His great insight was to recognize that the computer with visual interaction couldn’t automatically recognize all these modes (remember, no mouse) and rather had to be instructed through the keyboard as to which mode needs to be used at what time and thus the modal editor called vi (originally the visual part of the line editor ex) was born.
It is important to note that as frustrating as modern modeless text editors find the modal aspect of vi, this was such a huge leap beyond line editors that people flocked to it with glee. Those interested in context, and I don’t do this with my students, should consider playing a bit with ed on their favorite Linux or UNIX system. Then imagine doing this with a line printer. You can even get somewhat of a feel for both line editing and a printer terminal on old school UNIX with this web based PDP-11 emulator.
Please note this historical context is vitally important as students rarely think about how their modeless editors work and throwing them into a modal editor without knowing about modes is one of the primary reasons so many students find vim so impenetrable. All the commands in the world won’t help if you do not understand why there are modes. This is even more further compounded by the fact that switching modes is something that is almost entirely unseen when a teacher is using vim in front of students. As both an undergraduate and graduate student, I have had the experience of watching a teacher just start using vi or vim and explicitly or implicitly telling students to figure it out. This. Rarely. Works. In fact, as the discussion on my original post points out, this can be recipe for bias against students who lack outside resources. vim is not difficult, but it does have to be explicitly taught.
At this point, I will go into a bit of how I teach the mechanics of vim. I am assuming the student can ssh into a command line machine now (or open up a command prompt on their machine). I am also assuming they can change their password (passwd), make a directory (mkdir), and change into that directory (cd). I then ask them to type:
vi hello.txtvi is almost always mapped to vim. If you end up with vi, which is easy enough to tell because vi doesn’t do syntax coloring of your favorite programming language and vim does, you may need to install vim on your particular system. Happily, if you only have vi, besides the color syntax, this guide will work just fine. Certainly consider reading more about the history of vi and vim, if you are interested.
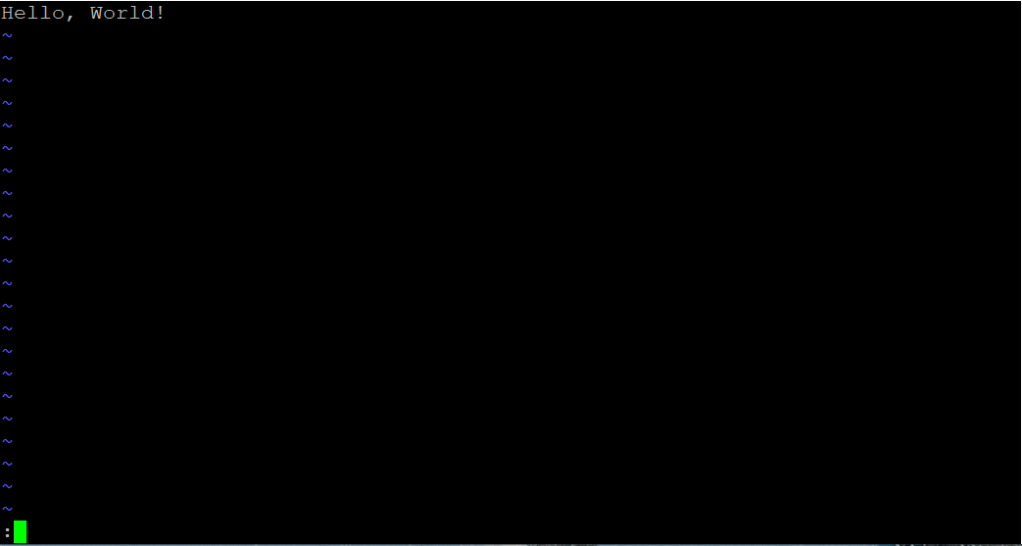
At this point, you are in command mode.
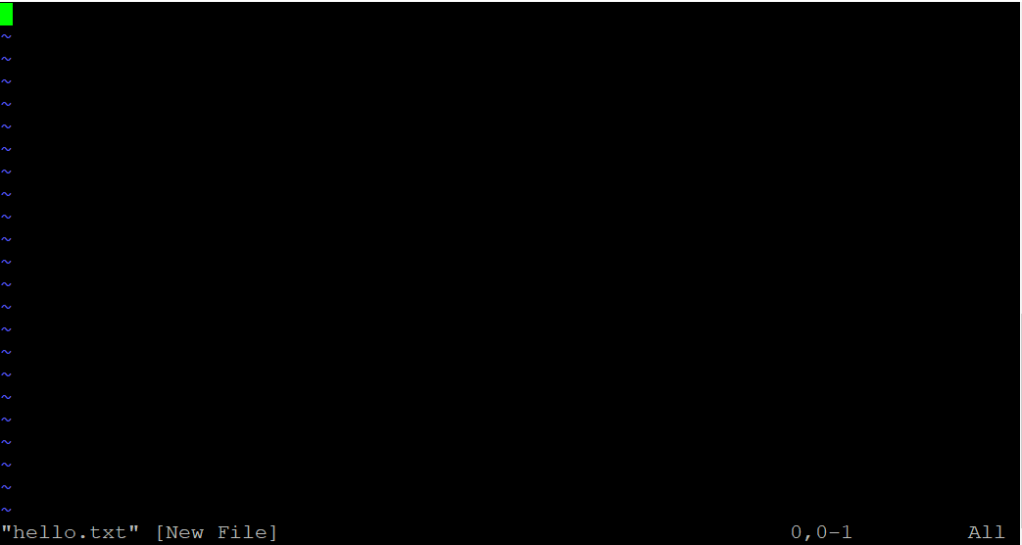
And here is where we get into the running joke about how impossible it is to exit vim. Students must understand they are in command mode. Absolutely nothing interesting (yet) can happen in command mode, so we have to give it a command. The first command we will learn is i. Yes, just the letter i. This puts us in insert mode.
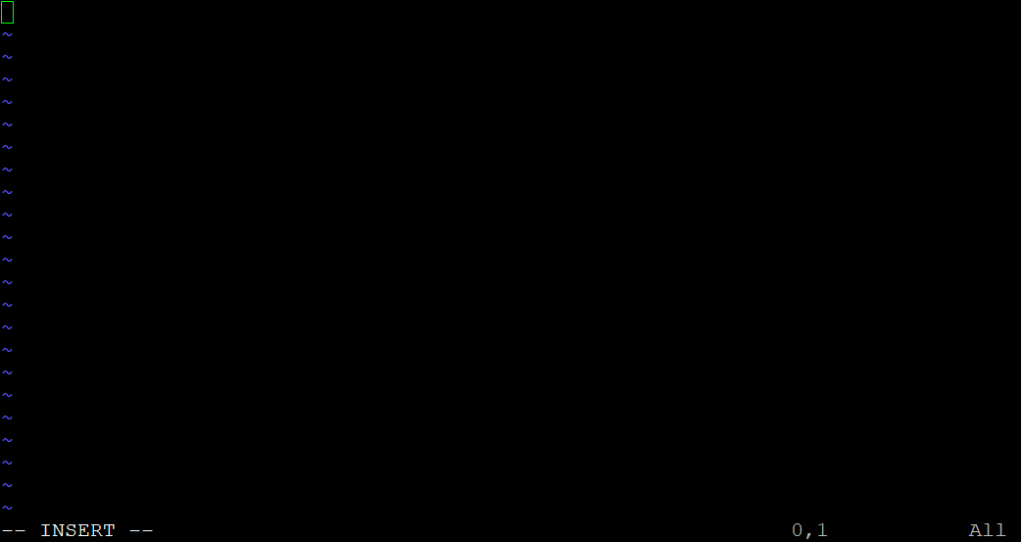
Please take note of the — INSERT — in the bottom left hand corner of the screen. At this point, we can type and I ask the student’s to type Hello, World!
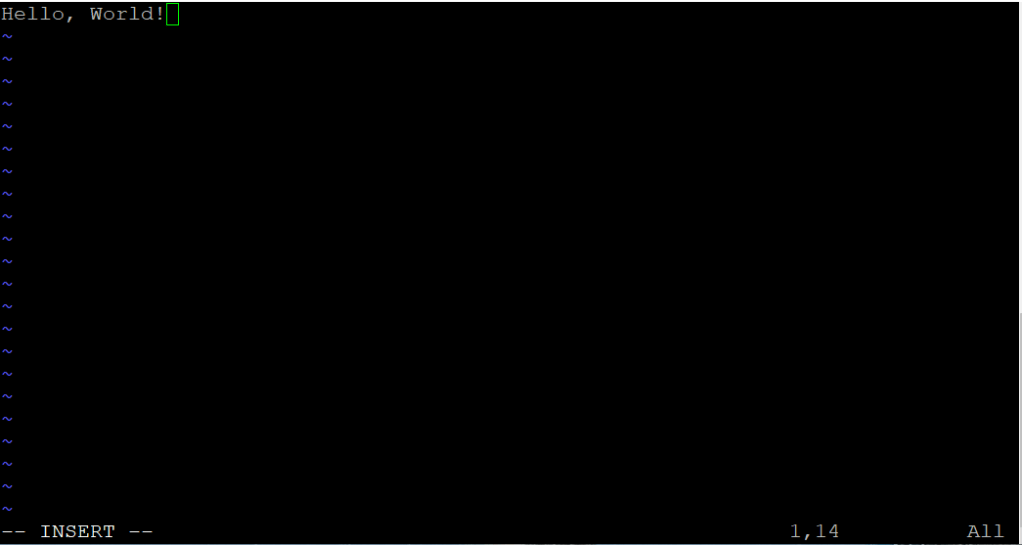
The obvious question is, of course, how do we now save it? This is a perfect time to remind students that vim is modal and that we are in insert mode right now. If we using a modeless text editor, we could click on maybe the file menu and choose save. What ever shall we do?
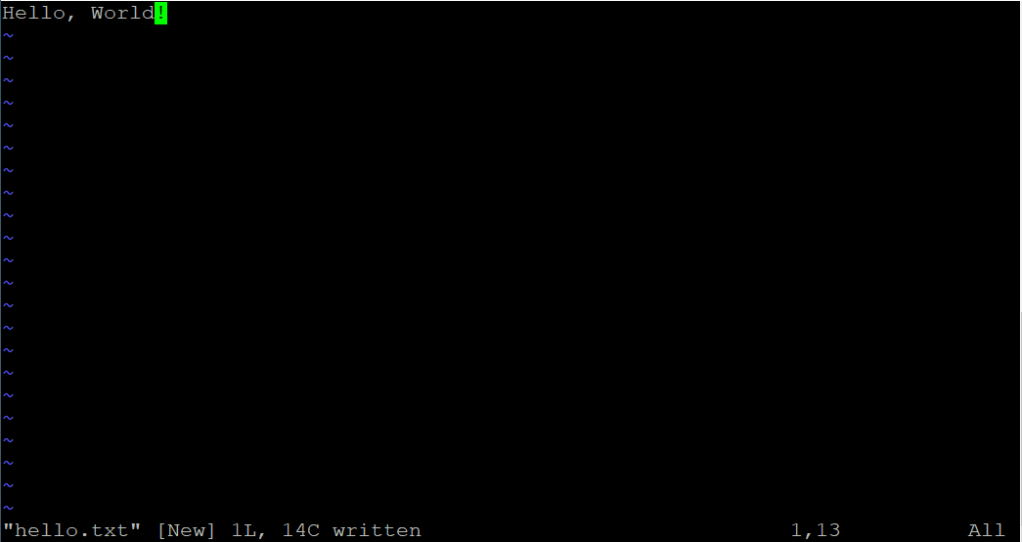
Why, switch modes, of course! To exit insert mode and reenter command mode we simply type the esc key (be careful, students will sometimes literally type e… s… c…). Notice that by pressing the esc key we lose the — INSERT — in the lower right hand corner and move back into command mode.
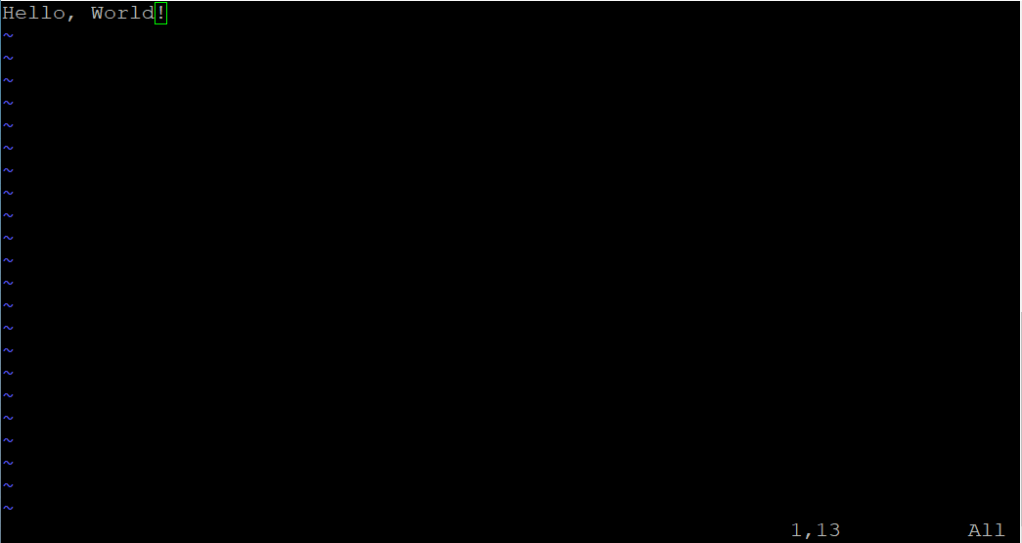
At this point, I explain that in lieu of menus we use the : character (and not the ; character, English teachers all over the world will thank you for explaining that there is, indeed, a big difference and, for my young students, I always make a point of encouraging them to ask their English teacher what the difference is).
This now allows us to choose commands. I always start with the w command (for write file… s for save would have made life more easy for future people teaching vim, but s is used for substitute – not covered in this guide). I then have students type w and then hit enter/return.
I then have them repeat the sequence esc, :, followed by q (to quit) and return/enter. Experienced vim users will point out the esc is unnecessary (we are already in command mode), but an extra esc here or there to reinforce this idea of command mode seems to be very helpful to students new to vim. Experienced vim users will also point out you can chain commands i.e. esc followed by :wq. I do share this later on, but prefer to associate each command with the equivalent menu selection for beginners. This ability to chain commands is one of most important reasons why people like vim, though, and is something I definitely cover in the long run. Who wants to do File->Save, File->Quit with the mouse when you can do esc, :wq return?!
At this point I teach the students the cat command and ask them to type to see the fruits of their labor:
cat hello.txtFinally, to reinfornce everything we have done so far, I ask them to type:
vi hello.txtand then change the Hello, World! text to something of their own creation by first going into insert mode (i) and then saving (writing, if you prefer) it (esc, :w, return – remember that the esc moves you to command mode!), and then quitting (esc, :q, return). Students are then asked to cat their new hello.txt to be sure they saved what they wrote.
Repetition is the key to learning all this and I quickly follow up by giving them a C hello world program and asking them to vi hello.c and input it. clang will quickly tell them if they have made any typical mistakes!
More about why and how I teach C at a later date, but the key trick here is to give them a very text intensive first programming assignment. I often have students write a program that prints out their class schedule. The secret here is that the goal isn’t so much printf in C but rather practicing vim to the point of reasonable automaticity.

One thought on “How I Teach vim”